FCU2201 嵌入式控制单元默认已经配置了网络拓扑结构以方便客户使用,默认网络逻辑为:2 个 ETH以太网接口和 m.2 接口的 PCIE WIFI AP 组建为一个网桥,并默认启动 DHCPD 服务,任何通过以太网或者热点接入。FCU2201 嵌入式控制单元的用户终端会获取一个 IP 地址,并通过 FCU2201 嵌入式控制单元上搭载的 5G/4G 实现上网。 下面分享一下使用WIFI作为WAN口实现所接设备上网的应用场景。 FCU2201默认是将 WiFi 模块用作 AP 热点功能,为了实现这一目的,需要WIFI模块用作 STA 模式并将 WiFi 模块从网桥中去除,可以执行以下命令:
root@localhost:~#rm/etc/systemd/system/multi-user.target.wants/hostapd.service root@localhost:~# rm /etc/systemd/network/wlan0.network |
同时需要修改开机自启脚本.forlinx.sh, root@localhost:~# ls -a .bash_history .bashrc .cache .config .forlinx.sh .gnupg .profile Net_Tools root@localhost:~# vi .forlinx.sh #!/bin/bash //iw dev wlp1s0 set 4addr on //将其注释 sleep 5 modprobe iwlwifi BOARD_NAME=`cat /proc/cmdline | awk -F " " '{print $6}' | awk -F "=" '{print $2}'` SERDES1=`cat /proc/cmdline | awk -F " " '{print $7}' | awk -F "=" '{print $2}'` [....] |
配合完成后,通过WIFI模块连网测试:
参数说明:-s:准备连接的WIFI名称 ; -p:准备连接的WIFI密码,如果没有加密请使用-p NONE root@localhost:~#/root/Net_Tools/wifi_connect.sh -s forlinx -p fl03123102650 Begain Wireless connect ... ----------------------- SSID: forlinx PASW: fl03123102650 ----------------------- Wireless point is wlp1s0 Wireless status is DISCONNECTED Wireless status is SCANNING Wireless status is SCANNING Wireless status is SCANNING [ 919.801926] wlp1s0: failed to set TX queue parameters for AC 0 [ 919.813788] wlp1s0: failed to set TX queue parameters for AC 1 [ 919.820244] wlp1s0: failed to set TX queue parameters for AC 2 [ 919.826646] wlp1s0: failed to set TX queue parameters for AC 3 Wireless status is COMPLETED ----------------------- Wireless connect status bssid=04:d7:a5:f9:2e:78 freq=2412 ssid=forlinx id=0 mode=station pairwise_cipher=CCMP group_cipher=TKIP key_mgmt=WPA2-PSK wpa_state=COMPLETED address=28:7f:cf:ca:89:9c uuid=2d6ba737-00d3-55c6-ab0b-b10df8ef1d1d ----------------------- Wireless connect done !!! Auto start setting not change |
连网成功后,查看设备节点的信息 root@localhost:~# ifconfig wlp1s0 wlp1s0: flags=4163<UP,BROADCAST,RUNNING,MULTICAST> mtu 1500 inet 192.168.5.239 netmask 255.255.254.0 broadcast 192.168.5.255 inet6 fe80::2a7f:cfff:feca:899c prefixlen 64 scopeid 0x20<link> ether 28:7f:cf:ca:89:9c txqueuelen 1000 (Ethernet) RX packets 138 bytes 18123 (18.1 KB) RX errors 0 dropped 0 overruns 0 frame 0 TX packets 18 bytes 2593 (2.5 KB) TX errors 0 dropped 0 overruns 0 carrier 0 collisions 0 |
进行ping测试,并设置转发 root@localhost:~# ping www.baidu.com -c 5 PING www.a.shifen.com (14.215.177.38) 56(84) bytes of data. 64 bytes from 14.215.177.38 (14.215.177.38): icmp_seq=1 ttl=51 time=62.5 ms 64 bytes from 14.215.177.38 (14.215.177.38): icmp_seq=2 ttl=51 time=40.2 ms 64 bytes from 14.215.177.38 (14.215.177.38): icmp_seq=3 ttl=51 time=40.5 ms 64 bytes from 14.215.177.38 (14.215.177.38): icmp_seq=4 ttl=51 time=45.5 ms --- www.a.shifen.com ping statistics --- 4 packets transmitted, 4 received, 0% packet loss, time 3004ms rtt min/avg/max/mdev = 40.284/47.238/62.544/9.091 ms root@localhost:~# iptables -t nat -A POSTROUTING -o wlp1s0 -j MASQUERADE |
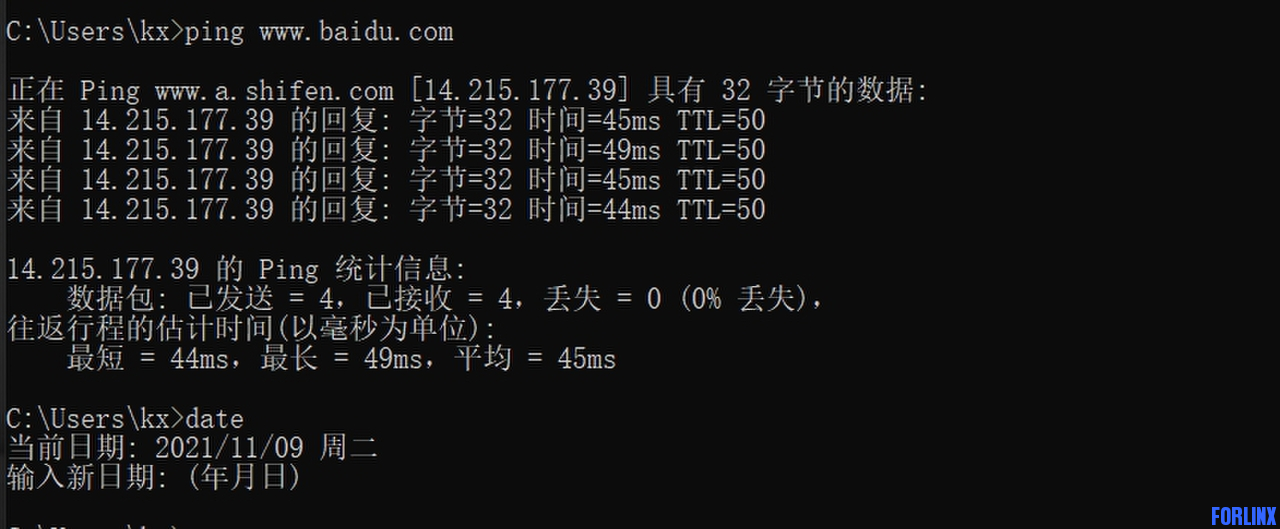
将网线与PC机相连,PC端设置为DHCP模式。 过一段时间后会看到,电脑动态获取到IP,范围为192.168.3.20~192.168.3.254 以下是我所接PC机获取到的IP及上网测试 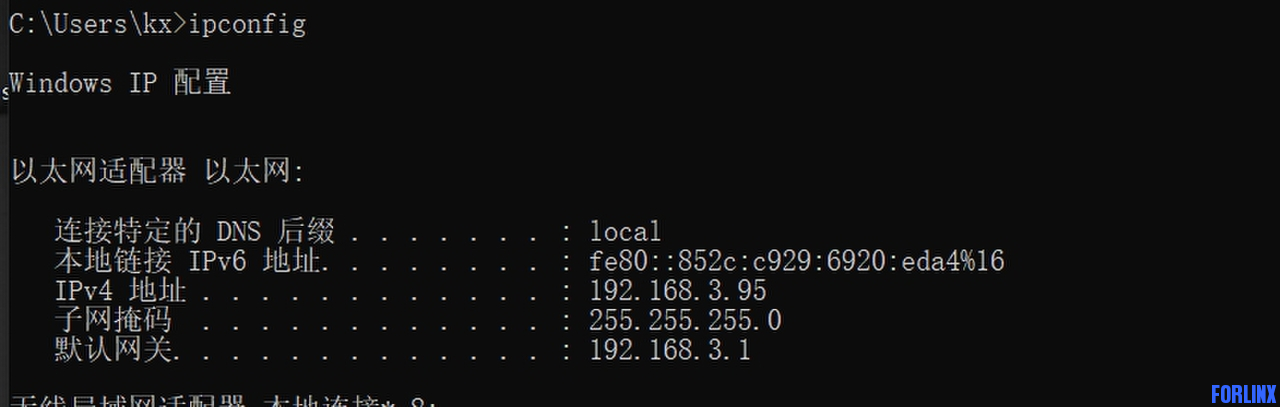
使用 iptables 操作完转发规则之后,如果想要保存此配置等下次上电自动启动配置,可以使用以下命 令保存 iptables 配置: root@localhost:~# netfilter-persistent save run-parts: executing /usr/share/netfilter-persistent/plugins.d/15-ip4tables save run-parts: executing /usr/share/netfilter-persistent/plugins.d/25-ip6tables save root@localhost:~# netfilter-persistent reload run-parts: executing /usr/share/netfilter-persistent/plugins.d/15-ip4tables start run-parts: executing /usr/share/netfilter-persistent/plugins.d/25-ip6tables start
|
|  |小黑屋|
飞凌嵌入式
( 冀ICP备12004394号-1 )
|小黑屋|
飞凌嵌入式
( 冀ICP备12004394号-1 )


