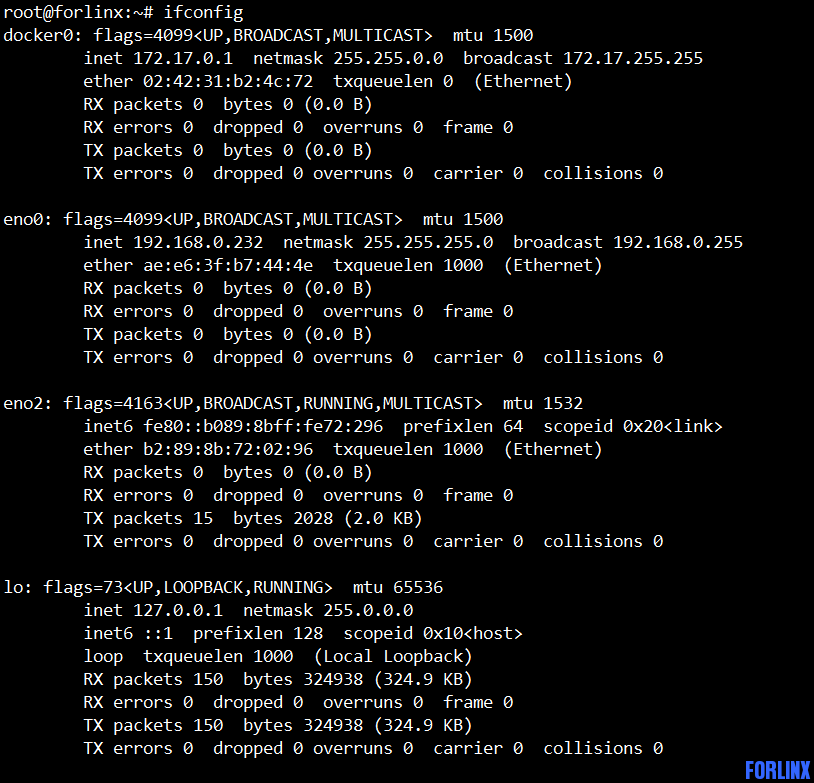
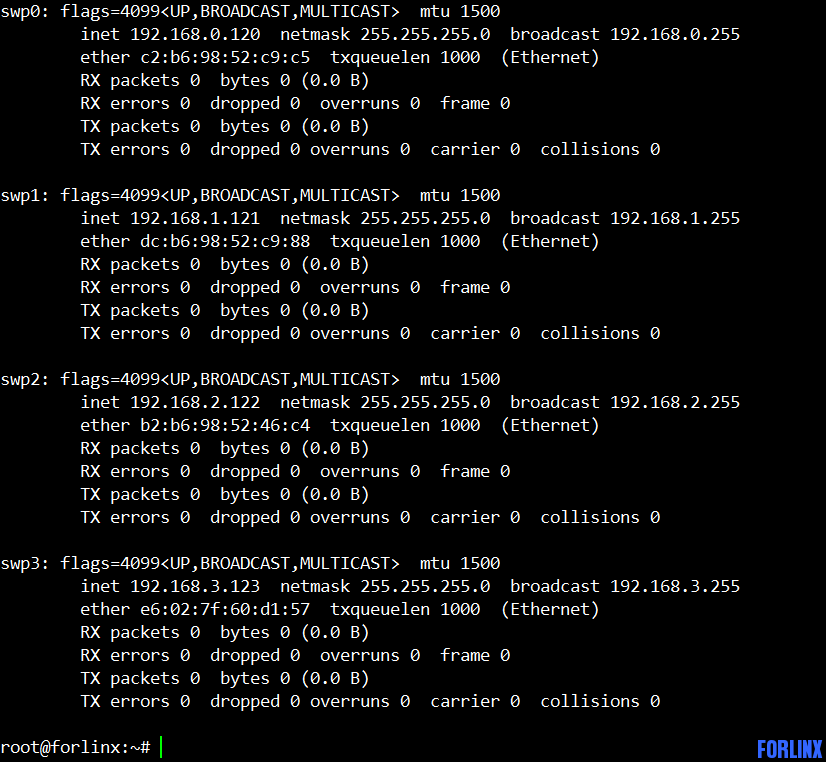
OK1028单独使用swp0-3网口配置
1. 使用system工具创建swp0、swp1、swp2、swp3对应的4个文件:
touch /etc/systemd/network/swp0.network
touch /etc/systemd/network/swp1.network
touch /etc/systemd/network/swp2.network
touch /etc/systemd/network/swp3.network
分别填写以下内容:
|
[Match]
Name=swp0
KernelCommandLine=!root=/dev/nfs
[Network]
#DHCP=yes
Address=192.168.0.120/24
Gateway=192.168.0.1 |
|
[Match]
Name=swp1
KernelCommandLine=!root=/dev/nfs
[Network]
#DHCP=yes
Address=192.168.1.121/24
Gateway=192.168.1.1 |
|
[Match]
Name=swp2
KernelCommandLine=!root=/dev/nfs
[Network]
#DHCP=yes
Address=192.168.2.122/24
Gateway=192.168.2.1 |
|
[Match]
Name=swp3
KernelCommandLine=!root=/dev/nfs
[Network]
#DHCP=yes
Address=192.168.3.123/24
Gateway=192.168.3.1 |
每个文件的内容和如下swp0.network内容类似,但是[Name=swp0]属性不一样,要和文件名对应。
2. 在脚本中添加重启网络服务命令(红色字体):
vim /lib/systemd/system/ifup@.service
|
[Unit]
Description=ifup for %I
After=local-fs.target network-pre.target apparmor.service systemd-sysctl.service
Before=network.target shutdown.target network-online.target
BindsTo=sys-subsystem-net-devices-%i.device
After=sys-subsystem-net-devices-%i.device
DefaultDependencies=no
IgnoreOnIsolate=yes
[Service]
# avoid stopping on shutdown via stopping system-ifup.slice
Slice=system.slice
ExecStart=/bin/sh -ec 'ifup --allow=hotplug %I; ifup --allow=auto %I; \
if ifquery %I >/dev/null; then ifquery --state %I >/dev/null;systemctl restart systemd-networkd.service;fi'
ExecStop=/sbin/ifdown %I
RemainAfterExit=true
TimeoutStartSec=5min
|
3. 创建swp0、swp1、swp2、swp3对应的4个文件(此步骤是为了不连接网线ifconfig也可看到IP地址)。
|
touch /etc/network/inte**ces.d/swp0
touch /etc/network/inte**ces.d/swp1
touch /etc/network/inte**ces.d/swp2
touch /etc/network/inte**ces.d/swp3 |
分别填写以下内容:
|
auto swp0
iface swp0 inet static
address 192.168.0.120
netmask 255.255.255.0
gateway 192.168.0.1
broadcast 192.168.0.255 |
|
auto swp1
iface swp1 inet static
address 192.168.1.121
netmask 255.255.255.0
gateway 192.168.1.1
broadcast 192.168.1.255 |
|
auto swp2
iface swp2 inet static
address 192.168.2.122
netmask 255.255.255.0
gateway 192.168.2.1
broadcast 192.168.2.255 |
|
auto swp3
iface swp3 inet static
address 192.168.3.123
netmask 255.255.255.0
gateway 192.168.3.1
broadcast 192.168.3.255 |
4. 创建修改MAC地址脚本:
执行如下命令创建一个脚本文件:
|
root@forlinx:~#touch mac.sh
root@forlinx:~#vi mac.sh
//写入如下内容
#!/bin/sh
ifconfig swp0 hw ether c2:b6:98:52:c9:c5
ifconfig swp1 hw ether dc:b6:98:52:c9:88
ifconfig swp2 hw ether b2:b6:98:52:46:c4
ifconfig swp3 hw ether e6:02:7f:60:d1:57 |
修改权限:
|
root@forlinx:~#chmod 777 mac.sh |
创建一个设置mac的服务文件
|
root@forlinx:~#touch /etc/systemd/system/mac.service
root@forlinx:~#vi /etc/systemd/system/mac.service
//写入如下内容
[Unit]
Description=MAC
After=basic.service X.service thermal-zone-init.service
[Service]
ExecStart=/root/mac.sh
[Install]
WantedBy=multi-user.target |
其中Description一行需写入服务名,ExecStart需要写入可执行文件的绝对路径。
保存退出后,在终端上执行如下命令:
|
root@forlinx:~#systemctl enable /etc/systemd/system/mac.service
Created symlink /etc/systemd/system/multi-user.target.wants/mac.service→/etc/systemd/system/mac.service. |
此时即可将新添加的自启动服务生效,重启开发板后,此程序即可自动运行,在命令行 使用ifconfig 命令查看swp0、swp1、swp2、swp3的网卡信息,会发现MAC地址发生了改变


|  |小黑屋|
飞凌嵌入式
( 冀ICP备12004394号-1 )